Install NixOS on DigitalOcean
We’ve been getting more into NixOS lately. Its been very helpful in building very deterministic systems that are easy for team members to replicate. This is a first in a series of posts that cover how to get up and running with NixOS. First, a quick primer.
NixOS is an open-source Linux distribution built on the Nix package manager, focused on system configuration management and package isolation. It allows the entire system configuration to be declared in a single file, enabling atomic upgrades and rollbacks. It’s known for its reproducibility, which ensures identical system setup given the same configuration, and its robust dependency management to avoid “dependency hell”.
PRE-REQUISITES
In this post, I’ll show you the quickest way to get up and running with it on your DigitalOcean account. Here is what you will need to begin:
- A DigitalOcean account with the ability to create Droplets. Often this involves you putting in your credit card so that they can bill you for usage.
OUR APPROACH
There are two ways you can install NixOS on a DigitalOcean Droplet. The first is to create a NixOS image and then import it into your Custom images so that when you create a Droplet in the future, you can use that image. The second approach, and the one we will use, is to create a Droplet from an existing image and then convert it by using a script called nixos-infect.
To do this, we use the DigitalOcean User Data option to supply some commands to run immediately after the Droplet is created. Generally, in all cloud providers like GCP, AWS, and DigitalOcean, this is handled by cloud-init. Each image that is used to create a Droplet on DigitalOcean will look for this data and execute those commands, thus by using this method, we can automate the setup of the Droplet.
CREATE THE DROPLET

Fig. 1.2 – Create a new Droplet
Region
Choose a region you want your Droplet to be in. For me, I choose the one closest to me which also happens to be one of the countries we operate out of – Singapore!
OS Image
Use Ubuntu 22.04 LTS x64 for this one. You can experiment with others, but I typically use this one.
Droplet Type
Since this is an experiment, I choose the cheapest option:
- Shared CPU (Basic)
- CPU Options – Regular / Disk Type: SSD
- 512MB/1CPU/10GB SSD
This costs me $4 per month.
Authentication
You need a way to login and test your machine. We will use SSH and use SSH Key based authentication. This is more secure than using only a password. If you don’t know how to generate an SSH Key pair, follow the steps in this post. Once you do this, you will need to upload your public key into your dashboard. You will generally only need to do this once per account. You can upload as many SSH keys as you need (if you login from different machines.)
I will assume you followed the steps, and uploaded your key. For my use case, I am working from my laptop called leonov, so I will use select that key (Fig 1.3) This key is attached to the root user.

Fig 1.3 – Selecting which SSH Key to use for the Droplet
User Data
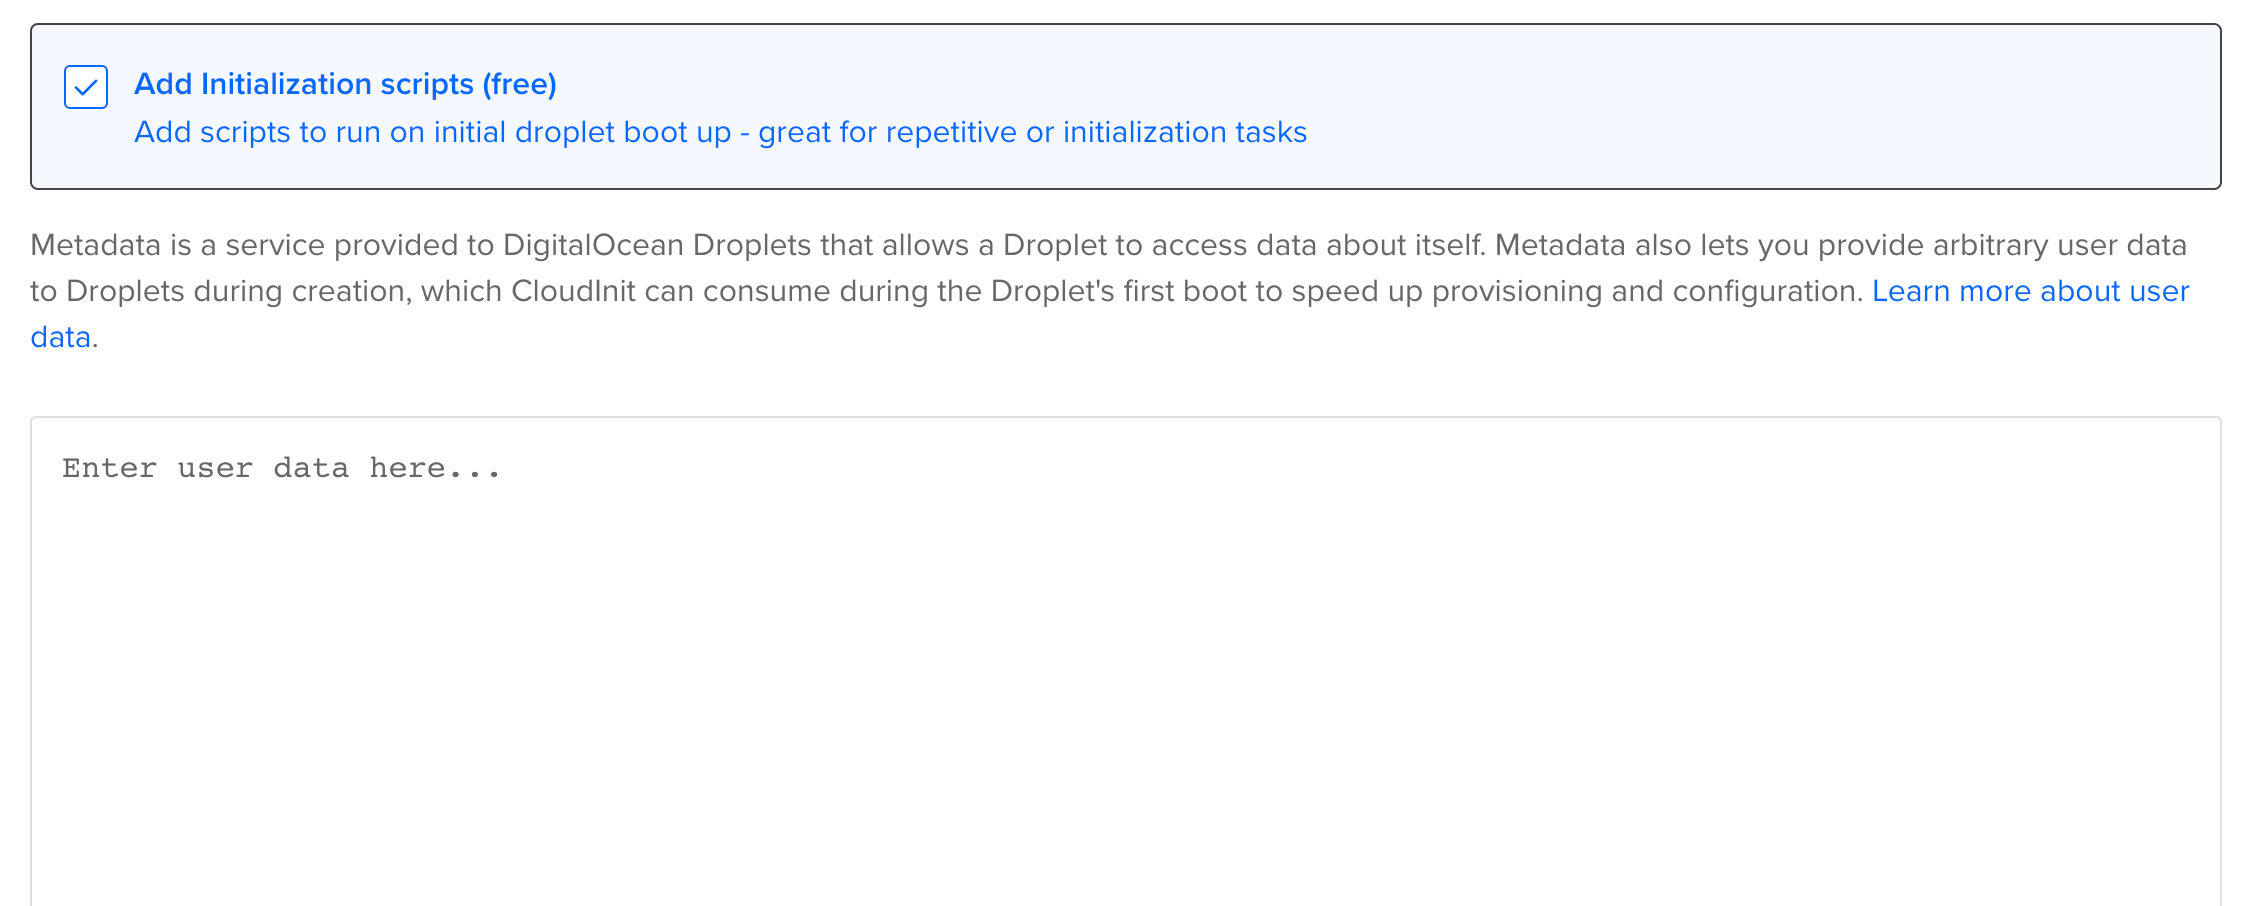
Now for the fun part. Scroll down below until you see “+ Advanced Options”. Expand that and select “Add Initialization Scripts” (Fig 1.4). In this text box, copy and paste the following text:
#cloud-config
runcmd:
– curl https://raw.githubusercontent.com/sheran/nixos-infect/master/nixos-infect | PROVIDER=digitalocean NIX_CHANNEL=nixos-23.05 bash 2>&1 | tee /tmp/infect.log
It is important to have the #cloud-config at the beginning of the line.

Fig 1.4 – Adding the User Data
Look through one final time and see if everything looks good and then click “Create Droplet”

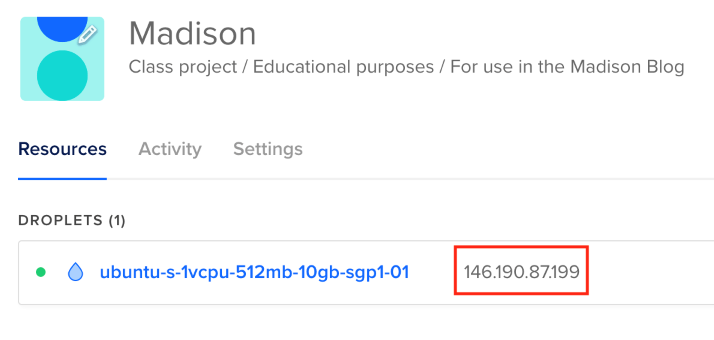
Fig 1.5 – Copy the public IP address
After a minute or so, you should be ready to login to your new Droplet. You will see that after the Droplet is created, it shows an IP address (Fig 1.5). Keep in mind what is happening now. DigitalOcean will create an Ubuntu 22.04 Droplet, then it will run the cloud-init code we gave it which basically converts the image to NixOS. This process itself takes about 3-4 minutes. So depending on when you login, you will either login to the Ubuntu box, or the NixOS box. I find that if I wait about 5-6 minutes the Droplet is fully converted. A quick tip is if you happen to login to the Ubuntu Droplet, you can tail -f /var/log/cloud-init-output.log and follow the conversion to NixOS as it happens. The machine will reboot and once it comes back online, you will be logged into NixOS.
Copy that IP address and then open a terminal or shell and login to the Droplet as in Fig 1.6

Fig 1.6 – Logging into the NixOS Droplet
And you’re done! You’ve now created a NixOS Droplet in DigitalOcean.
This is one of the very first articles in this NixOS series. Keep an eye out for more. We plan to address installations in other cloud providers like GCP, AWS, Azure and we will have a lot more on what you can do with NixOS, how powerful it is, and why we like to use it.
About the Author
Sheran Gunasekera is a security researcher and software developer. He is co-founder and Director of Research for Madison Technologies, a product development company in Singapore, where he advises the in-house engineering team in both personal computer and mobile device security. Sheran’s foray into mobile security began in 2009 when he started with BlackBerry security research. Since then, he has been in leadership roles in both engineering and security at several start-ups in Asia including GOJEK, the on-demand multi-service app that is now publicly listed.


