Intuitive Multi-Cloud Deployments with Code
8 minutes read
We’ve covered how to install NixOS to DigitalOcean and then an example of how we can meaningfully deploy to DigitalOcean through cloud-init and NixOS. In this article, we will build incrementally to perform automated deployments.
What you will need:
- A DigitalOcean account with the ability to create Droplets. Often this involves you putting in your credit card so that they can bill you for usage.
- Generate a DigitalOcean Personal Access Token and have that handy.
- A Pulumi free account, sign up here and follow the instructions here on how to install and verify Pulumi.
- A currently supported version of Go installed on your local machine. (This can technically be any language you are comfortable with, but we will use Go for this post)
DIGITALOCEAN API
You will notice that in the prior articles, you would have to interact heavily with the DigitalOcean web portal. You did this to provision and configure your infrastructure. Personally, I think this approach is slow which is why we will cover an alternate method of provisioning infrastructure.
You may have noticed that when you Create a Droplet on DigitalOcean, there is an option called “Create Via Command Line” (Fig 1.1) next to the “Create” button on the dashboard.
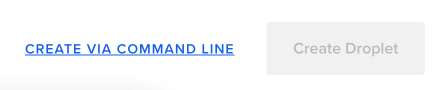
Fig 1.1 – Create via Command Line
If you click it, you will get a set of handy command line instructions on how to deploy with “curl” or with the DigitalOcean command line tool “doctl”. Some example code below:
curl -X POST -H 'Content-Type: application/json' \
 -H 'Authorization: Bearer '$TOKEN'' \
    -d '{"name":"ubuntu-s-4vcpu-8gb-amd-sfo3-01",
       "size":"s-4vcpu-8gb-amd",
        "region":"sfo3",
        "image":"ubuntu-22-04-x64",
        "vpc_uuid":"85e4dbfb-e706-46f5-aa33-eaaef92ec669"}' \
    "https://api.digitalocean.com/v2/droplets"
So if we ran this code on our terminal then it would automagically create a Droplet for us. We would need to obtain our Bearer Token first. DigitalOcean has instructions on how to generate a Personal Access Token (as mentioned in the list provided in the opening paragraph) which you can follow. Then you can use the token and run the command above to generate a Droplet with that specified configuration.
FIRST STEP TO MULTI CLOUD
The curl command above is good for provisioning infrastructure on DigitalOcean, but we want to go beyond that and look at writing code to handle deployments across other cloud providers, or even multiple cloud providers. We could technically consider Terraform for this, which does exactly what we want it to do. But for this use case, I’m going to consider Pulumi.
Pulumi is ideal for our use case because you do not need to learn a new language, like Terraform’s HCL. Instead, we can define our configurations in Python, Go, C#, Typescript, or even Java. Because of this, Pulumi becomes extremely intuitive for developers who are familiar with these languages, enabling them to write code effortlessly. If you’ve ever used a third-party library for the coding language of your choice, then you can easily write a Pulumi configuration.
In this article, I won’t delve into Pulumi. Therefore, you will have to do a bit more of your own legwork and research, particularly regarding how to install Pulumi and initial setup of it. Subsequently, throughout the remainder of this post, I’ll presume that you’ve completed all the necessary setup and installation steps, including logging into your Pulumi account.
Next, let’s try to replicate the curl setup from above:
Create a new Pulumi project. Video 1.1 has a rundown of how you can create a new Pulumi project.
Video 1.1 – Creating a new Pulumi Go project
If you prefer text, here’s a quick breakdown of the commands you will run:
mkdir blogpost3 && cd blogpost3
pulumi new go
Then answer the questions that the Pulumi CLI will ask you. If you then list the contents of that directory, you will see a set of files created for you. We are specifically interested in the main.go file.
package main

import (
	"github.com/pulumi/pulumi/sdk/v3/go/pulumi"
)

func main() {
	pulumi.Run(func(ctx *pulumi.Context) error {
		return nil
	})
}
For now, it is quite sparse, so let’s add some code and then review:
package main

import (
	"github.com/pulumi/pulumi/sdk/v3/go/pulumi"

	do "github.com/pulumi/pulumi-digitalocean/sdk/v4/go/digitalocean"
)

func main() {
	pulumi.Run(func(ctx *pulumi.Context) error {
		leonovSshKey, err := do.LookupSshKey(ctx, &do.LookupSshKeyArgs{
			Name: "Leonov",
		}, nil)
		if err != nil {
			return err
		}

		project, err := do.LookupProject(ctx, &do.LookupProjectArgs{
			Name: pulumi.StringRef("Madison"),
		})
		if err != nil {
			return err
		}

		droplet, err := do.NewDroplet(ctx, "nixospulumi", &do.DropletArgs{
			Image:   pulumi.String("ubuntu-22-10-x64"),
			Size:    pulumi.String("s-1vcpu-512mb-10gb"),
			Region:  pulumi.String("sgp1"),
			SshKeys: pulumi.StringArray{pulumi.String(leonovSshKey.Fingerprint)},
		})
		if err != nil {
			return err
		}

		_, err = do.NewProjectResources(ctx, "madison_resources", &do.ProjectResourcesArgs{
			Project: pulumi.String(project.Id),
			Resources: pulumi.StringArray{
				droplet.DropletUrn,
			},
		})
		if err != nil {
			return err
		}

		ctx.Export("dropletIP", droplet.Ipv4Address)

		return nil
	})
}
Line 6: We import the DigitalOcean module so that we can use it in our code.
Lines 11-16: Here, we are specifying the already existing SSH Key in my DigitalOcean dashboard. This allows me to login to the Droplet as root from my laptop called leonov using my SSH key
Lines 18-23: This part specifies which project to put the newly created Droplet in. I have already created a project called Madison in my DigitalOcean account, and therefore this Droplet will be created there.
Line 25-33: Here is where we really create the Droplet. You can see that we specify the Name of the Droplet we want to create, the Image type, the Size of the Droplet and lastly the Region in which to create this Droplet in. We also specify the SSH key that will be added to the known_hosts file on the Droplet.
Line 35-43: This is how you add the Droplet to a specific Project on DigitalOcean.
Line 45: Lastly, this is a piece of data that we want Pulumi to export. Here it is the IP address of the Droplet we just created. Any data that is added to the Export is printed out after the infrastructure is provisioned.
Now before we run this, we have to tell Pulumi what our DigitalOcean Personal Access Token is. To do this, run the following command:
pulumi config set digitalocean:token dop_v1_1234567890abcdefghijklmnopqrstuvwxyz1234567890abcdefghijklmnopqr --secret
This will add your Personal Access Token to the Pulumi configuration and encrypt it both locally as well as on the Pulumi dashboard. Replace dop_v1_1234567890abcdefghijklmnopqrstuvwxyz1234567890abcdefghijklmnopqr with your own Personal Access Token.
Now we can finally provision our infrastructure with Pulumi by running:
pulumi up
This should bring up your stack as shown in Video 1.2
Video 1.2 – Creating the infrastructure with Pulumi
BRINGING IN THE USER DATA FOR A CUSTOM CONFIGURATION
Lastly, all we have to do is include our User Data for DigitalOcean. We will use the same User Data from our previous post which converts our Droplet into NixOS and then installs the relevant containers to setup WordPress. I ended up putting the User Data in a sepeate file called userdata.yml and then reading it from within my Go Program. So the new code looks like this:
package main
import (
	"os"

	"github.com/pulumi/pulumi/sdk/v3/go/pulumi"

	do "github.com/pulumi/pulumi-digitalocean/sdk/v4/go/digitalocean"
)

func main() {
	pulumi.Run(func(ctx *pulumi.Context) error {
		userdata, err := os.ReadFile("userdata.yml")
		if err != nil {
			return err
		}

		leonovSshKey, err := do.LookupSshKey(ctx, &do.LookupSshKeyArgs{
			Name: "Leonov",
		}, nil)
		if err != nil {
			return err
		}

		project, err := do.LookupProject(ctx, &do.LookupProjectArgs{
			Name: pulumi.StringRef("Madison"),
		})
		if err != nil {
			return err
		}

		droplet, err := do.NewDroplet(ctx, "nixospulumi", &do.DropletArgs{
			Image:    pulumi.String("ubuntu-22-10-x64"),
			Size:     pulumi.String("s-1vcpu-512mb-10gb"),
			Region:   pulumi.String("sgp1"),
			SshKeys:  pulumi.StringArray{pulumi.String(leonovSshKey.Fingerprint)},
			UserData: pulumi.String(string(userdata)),
		})
		if err != nil {
			return err
		}

		_, err = do.NewProjectResources(ctx, "madison_resources", &do.ProjectResourcesArgs{
			Project: pulumi.String(project.Id),
			Resources: pulumi.StringArray{
				droplet.DropletUrn,
			},
		})
		if err != nil {
			return err
		}

		ctx.Export("dropletIP", droplet.Ipv4Address)

		return nil
	})
}
OK WHY DO ALL THIS?
Our example here is specific to DigitalOcean. The true power of using Pulumi and cloud-init is aparent when you adapt this same configuration for cloud providers like AWS, GCP, or Azure. With very minimal code changes, you can adapt this same configuration for use on other cloud providers.
Once you have adapted your Pulumi code to use another cloud provider to bring up your VM instance, you then only have to configure it to use cloud-init to convert that instance to NixOS. Because NixOS is deterministic, you really don’t have to change that configuration at all. It runs the same on any NixOS instance on any cloud provider or even on your on-prem infrastructure.
I’d recommend giving it a go to understand first hand how beneficial this can be.
About the Author
Sheran Gunasekera is a security researcher and software developer. He is co-founder and Director of Research for Madison Technologies, a product development company in Singapore, where he advises the in-house engineering team in both personal computer and mobile device security. Sheran’s foray into mobile security began in 2009 when he started with BlackBerry security research. Since then, he has been in leadership roles in both engineering and security at several start-ups in Asia including GOJEK, the on-demand multi-service app that is now publicly listed.
8 minutes read
Like what you see? Here are more recommended articles for you:


Integrating AI into Super Apps for Better User Engagement
4 minutes read